How to Setup Custom Metadata Types for Record Types
Business Problem
You have heard time and time again, do not hard code Ids into your validation rules, flows and other Salesforce development. But you don't quite understand how to use Custom Metadata Types to help you solve this problem. This article will show you how to setup a solution for storing the names and Ids for all Record Types on all objects in Salesforce that you can add to as necessary.
We highly recommend going through the effort to set this up, it makes your deployments so much easier and less stressful when you only have to update the Id in one place. Plus, it is a Salesforce best practice!
How to Instructions
How to Configure a Custom Metadata Type
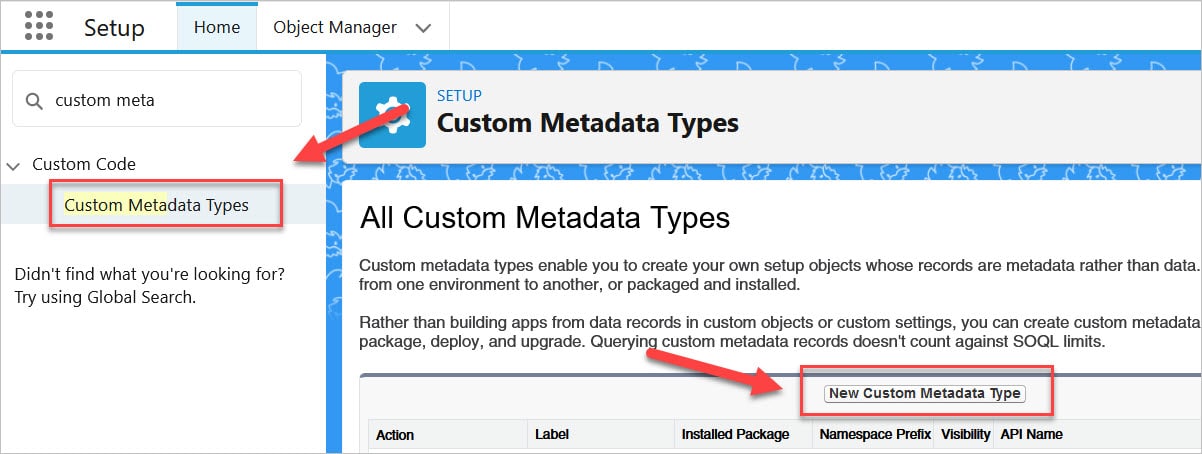
Go to: Setup > Custom Metadata Types > New Custom Metadata Type
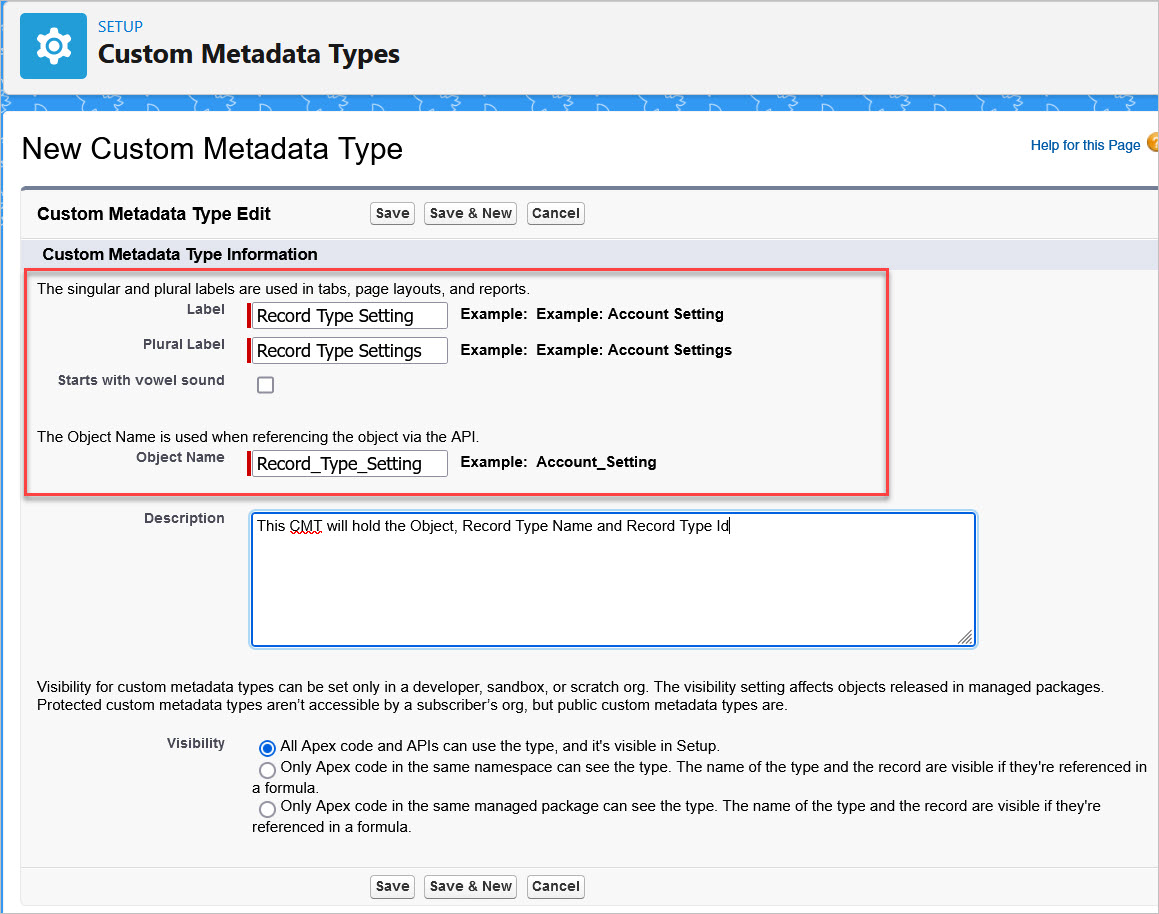
Update the following information:
- Label = Record Type Setting
- Plural Label = Record Type Settings
- Description = This CMT will hold the Object, Record Type Name and Record Type Id
- Click Save
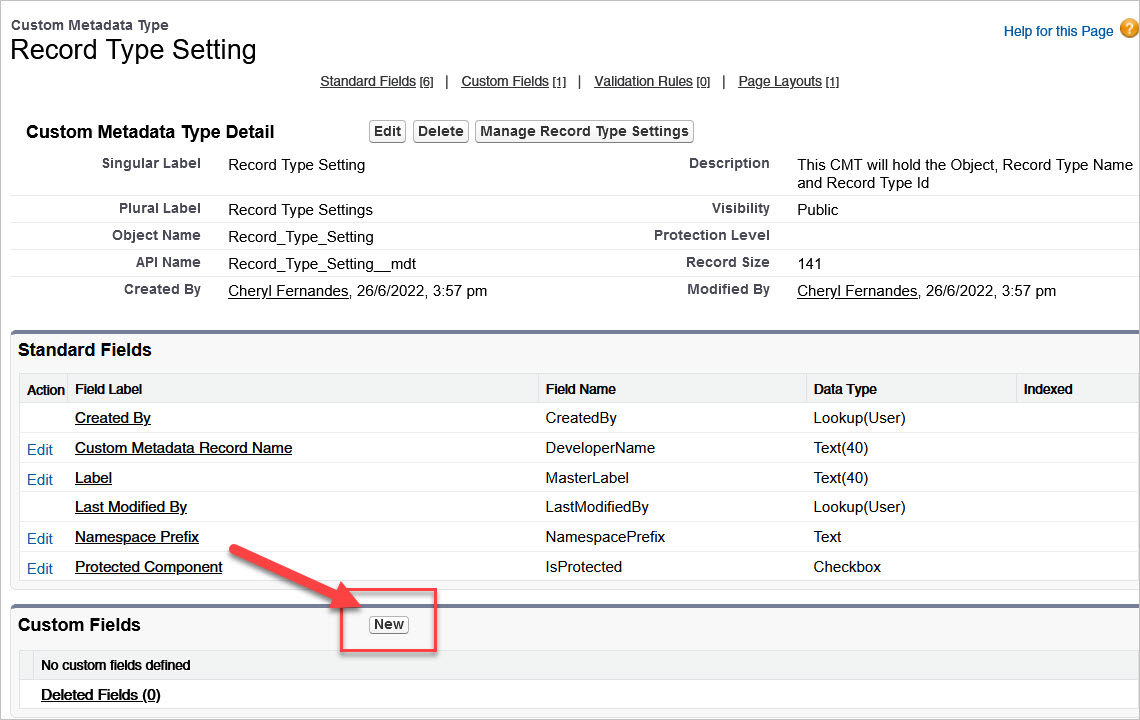
You will notice this screen looks very similar to a custom object screen. That's because this is essentially what we are creating except the data is stored in the 'back end' versus a tab on the UI.
Next, we will create the custom fields. This process will look very similar to creating a custom field for an object.
Click New under Custom Fields.
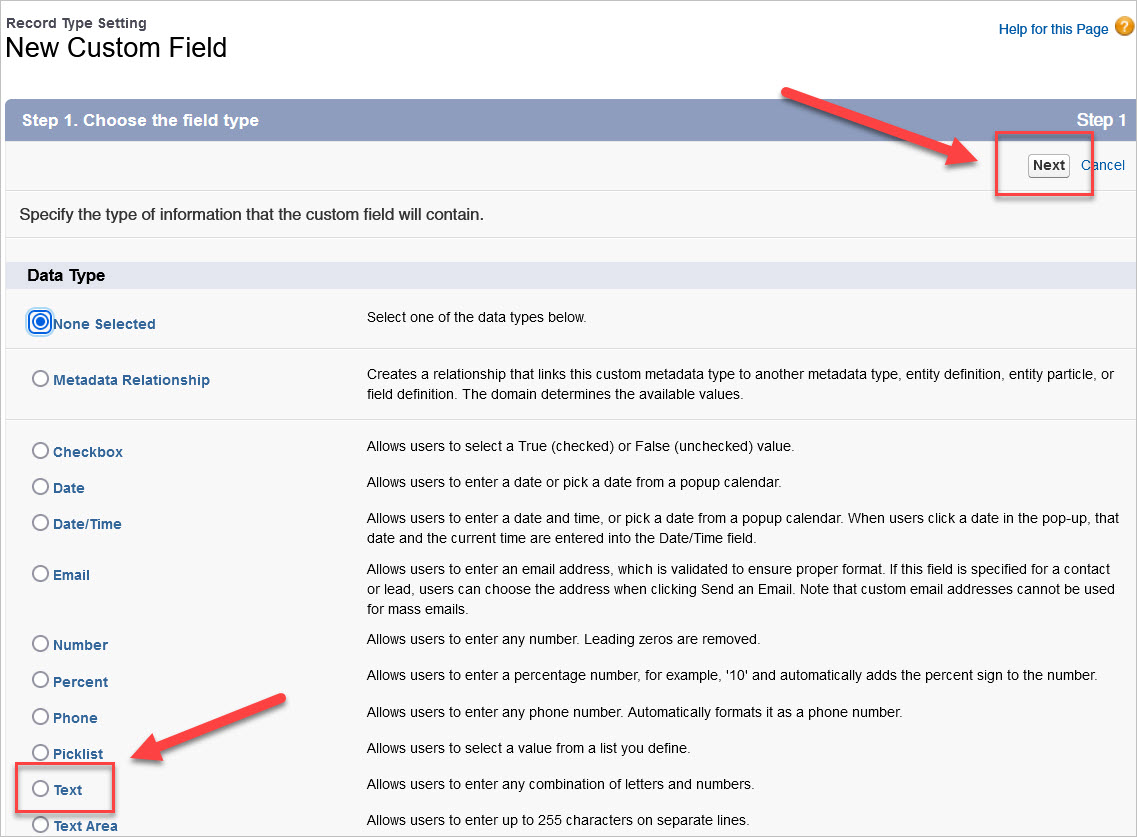
- Select Text and click Next
- Name = Record Type Name
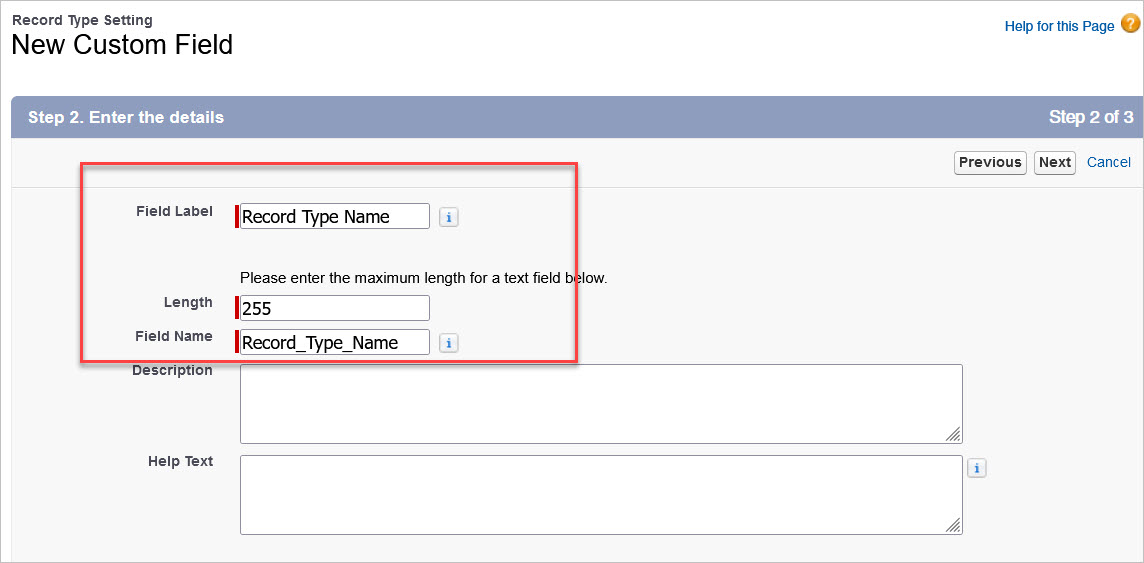
- Add field to the page layout
- Click Save and New
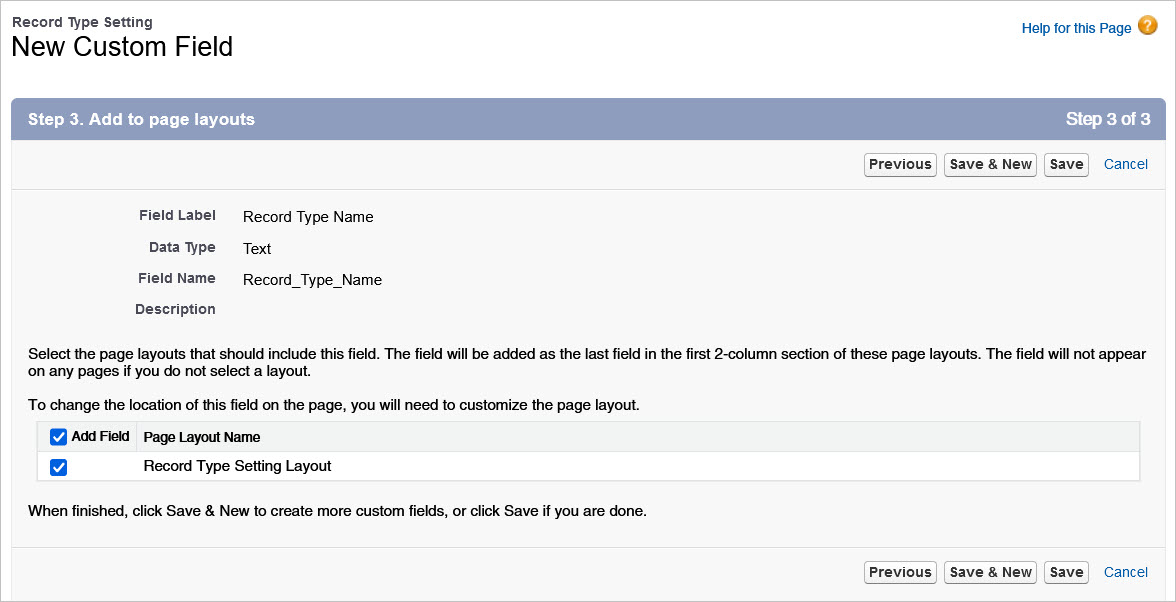
- Repeat the same process and create two more fields:
- Object
- Record Type Id
When you are done, you should see three custom fields like this:

Next, we need to add a record for each Record Type Id we want to reference.
Click the button called Manage Record Type Settings

- Click New

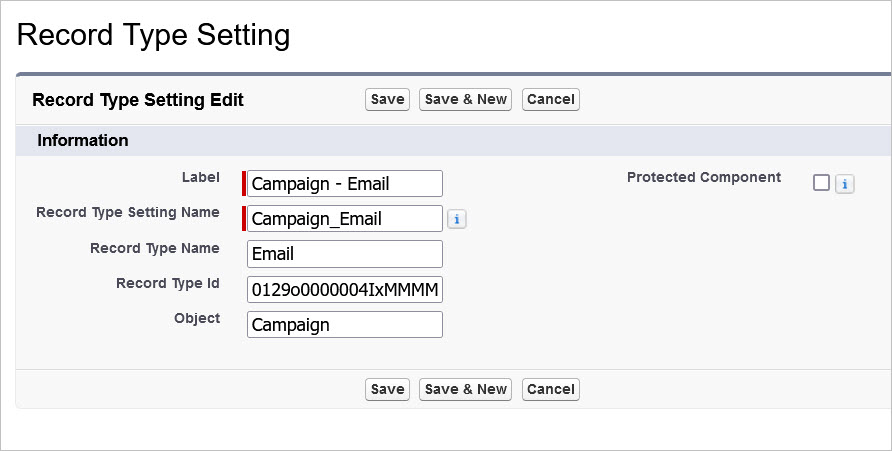
Enter the following information:
- Label = Name of object - Record Type Name
- Record Type Name = Name of the Record Type
- Record Type Id = 18 digit Id of the Record Type - if you do not know how to locate this Id, follow the steps in this Salesforce article.
- Object = Name of the object that contains the record type
In this example, we are storing the Record Type Name and Id of the Email record type on the Campaign object.
You will see a screen that looks like this. To navigate back to the new Custom Metadata Type you just created, click Custom Metadata Types.
Yes, we agree with you the navigation here is not ideal.
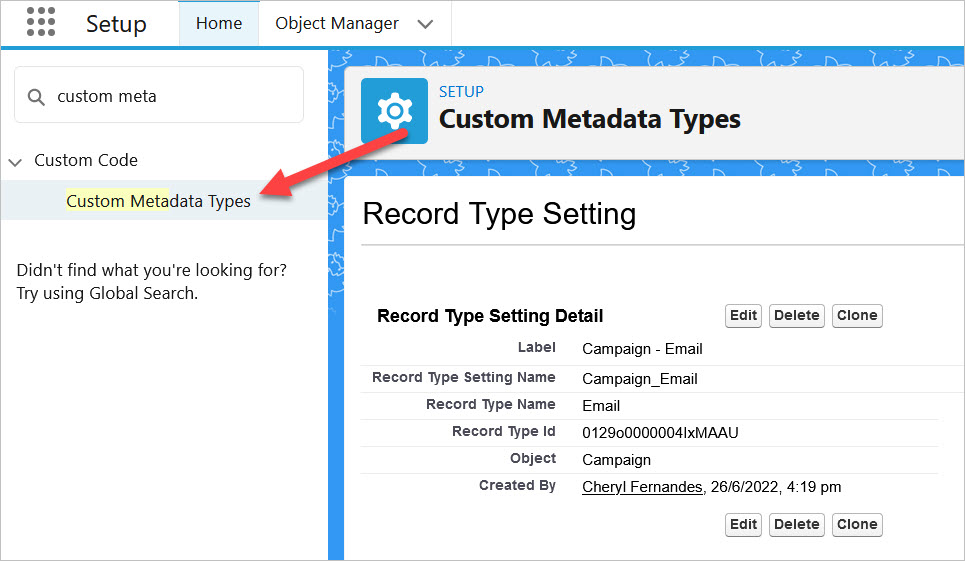
- Locate Record Type Setting and click on click Manage Records to see the record you just created.
- Click New to repeat this process for another Record Type.

How to Query a Custom Metadata Type in a Flow
We have a flow that is creating a Campaign record and we need to specify the Record Type Id in the flow. We have a Create Records element that is already configured to create the Campaign, it is just missing the Record Type Id.
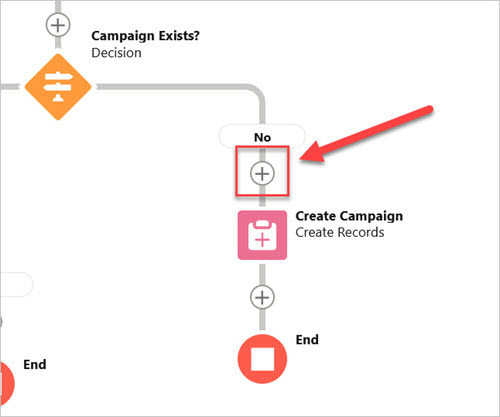
- Go to your Flow and click the + Sign before the element that needs to reference the Record Type Id.
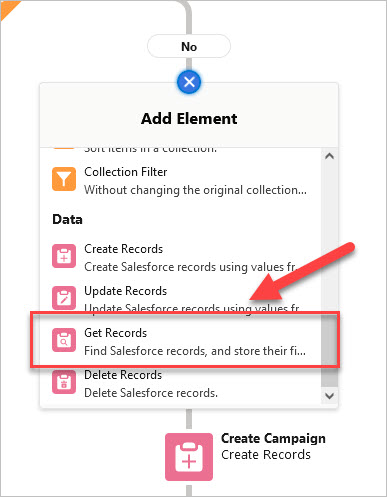
- Click Get Records
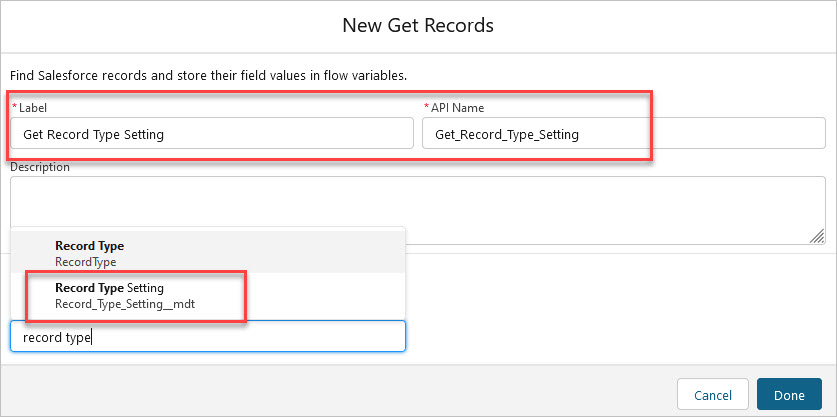
- Enter the Label = Get Record Type Setting
- Choose Object = Record Type Setting (do not choose Record Type)
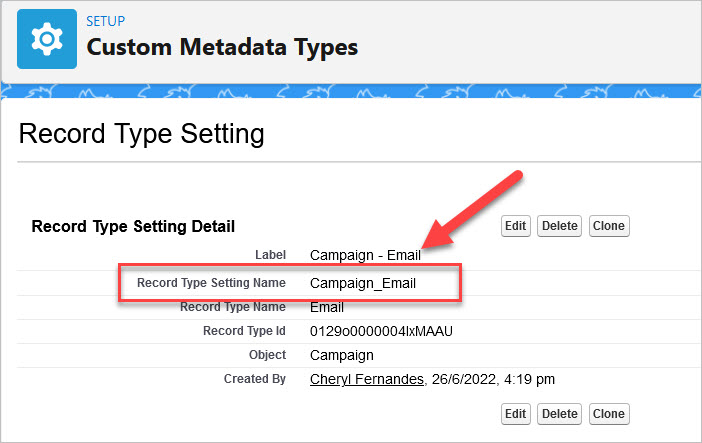
- You will need the DeveloperName from your Record Type Setting record. In our example, the DeveloperName = Campaign_Email
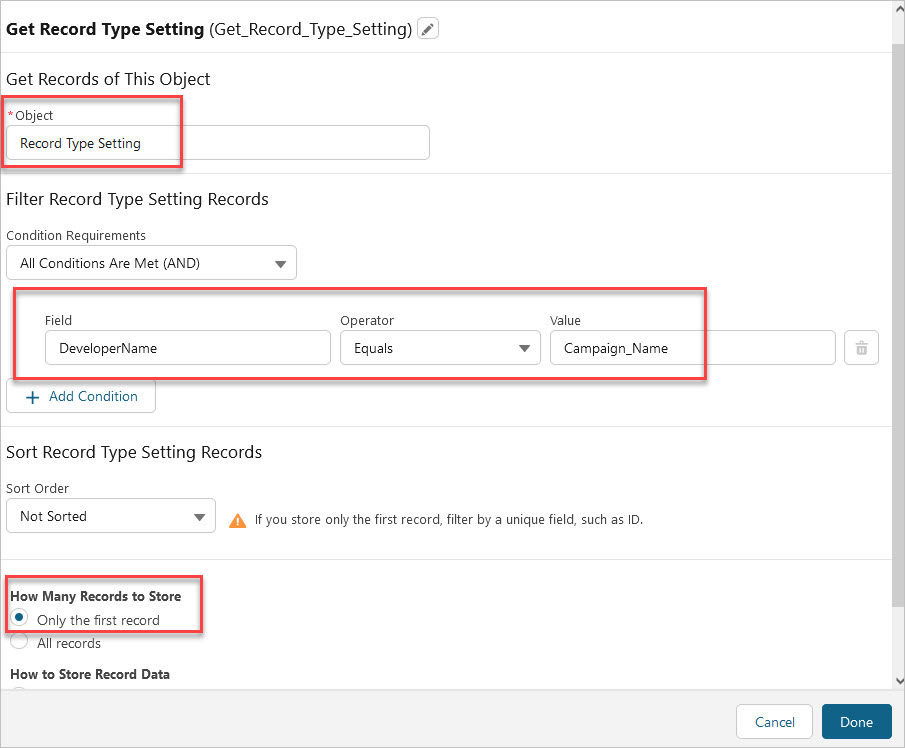
- Make sure your Get Records element looks like this:
- Object = Record Type Setting
- DeveloperName = Campaign_Name
- Only get the first record.
- Click on the element that needs the Record Type Id value and add Record Type Id as field. Value is from the Get Record Type Setting.

- Value = {!Get_Record_Type_Setting.Record_Type_Id__c}

Now you are ready to test it and make sure the record is created with the correct record type.
Congratulations, you have just successfully setup custom metadata types for Record Types! No more hard coding Ids again!
For any questions, comments, concerns – let us know in the comment section below!
We would love to hear from you!