How to Solve Contact Segmentation Using Accounts as Campaign Members Feature
Business Problem
Sales needs to pull a list of contacts for a specific set of companies in Salesforce. The catch is these companies do not have anything in common for you to filter for. You may have solutioned this in the past by creating a new checkbox field on the Account record and then ran a mass update to check this box for the selected Accounts. Then you could filter a Contact report using this checkbox field. This is not ideal because each time they have a new initiative, you need a new checkbox. Or maybe you do not have the permissions to create a new field because you are not an admin, so you had to resort to filtering a report by Account Name, which is definitely not fun.
Now, you can use the Accounts as Campaign Members feature to 'tag' a specific list of Accounts and then use a cross filter in a report to get the associated Contacts!
How to Instructions
First you have to enable this feature in Salesforce.
Go to: Setup > Accounts as Campaign Members > Enable > Save
Make sure you read through the considerations for enabling this feature from Salesforce.
Note: If you are in an older developer org, this feature will not be available. You will have to sign up for a newer developer org to use this feature.
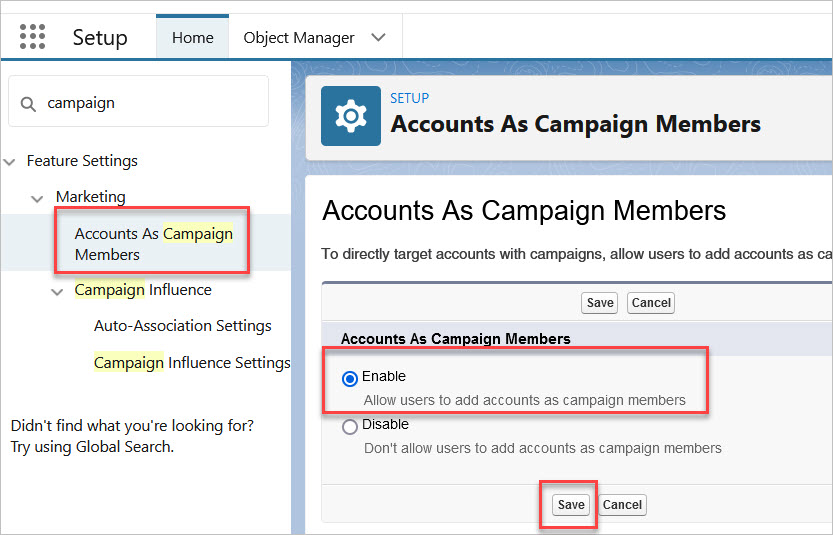
The following related lists will be available on the Account object for you to add to the page layout:
- Campaigns - this is the list of Campaigns that are associated with all of the Account's contacts.
- Campaign History - this is list of Campaign where the Account is a Campaign Member.
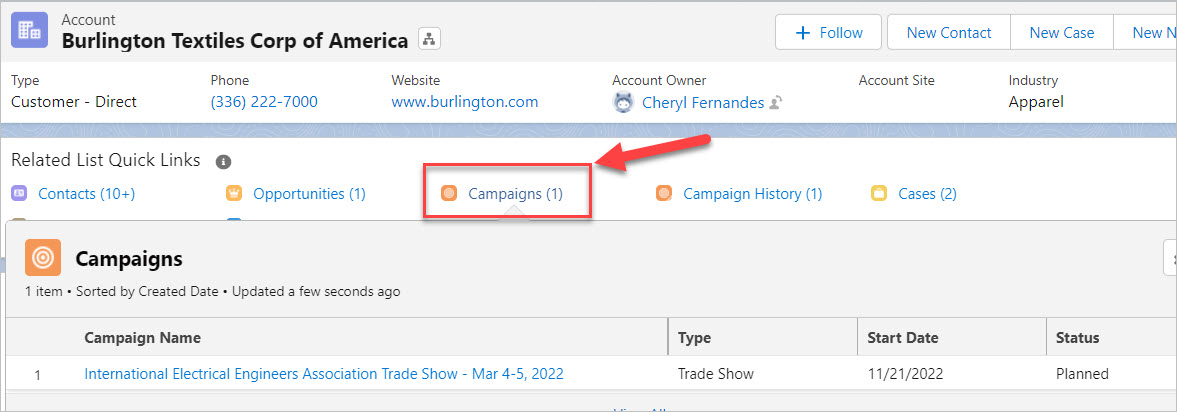
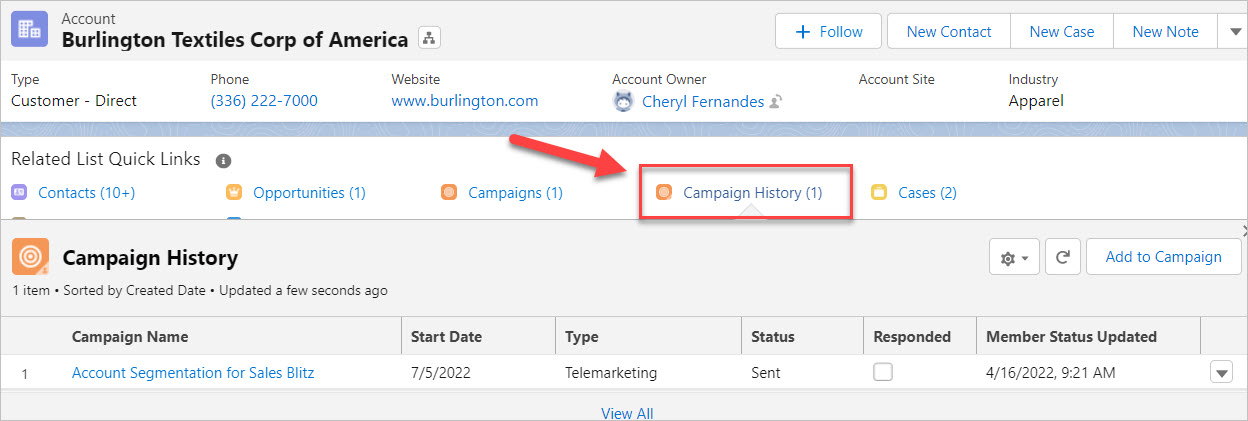
Next, we will add the Accounts to the Campaign. This can be done via data loader, from a report or from the Account record on the Campaign History related list. If you do not see the Add to Campaign button on the report or related list, make sure your user record has the Marketing User checkbox checked.
In this example, we are just adding the Accounts to the Campaign using the Add to Campaign button on the Campaign History related list on the Account record.

Next create a Accounts with Contacts report type (if you do not already have one) and add a cross filter to look for all of the Accounts with Campaign History for your Campaign. We are using the Campaign Name in the filter. You can use Campaign Id if your Campaign Names are not unique. The standard report type called Contacts with Accounts will not work, you must have a custom report type where the Account object is the primary object.
If you are not familiar with how to create the new report type or how to use cross filters in reports, here are the steps...
Side Note: Naming of campaigns should always be unique and use a naming convention. We recommend using the following syntax: Year + What the Campaign is. This way users can understand what the Lead or Contact did just based on the Campaign Name.
- Example Email Campaign Name: 2022 Salesforce Dreamforce Party Invite Email
- Example Trade Show Campaign Name: 2022 CES Conference
How to create a custom report type for Accounts with Contacts
Go to: Setup > Report Types > Continue
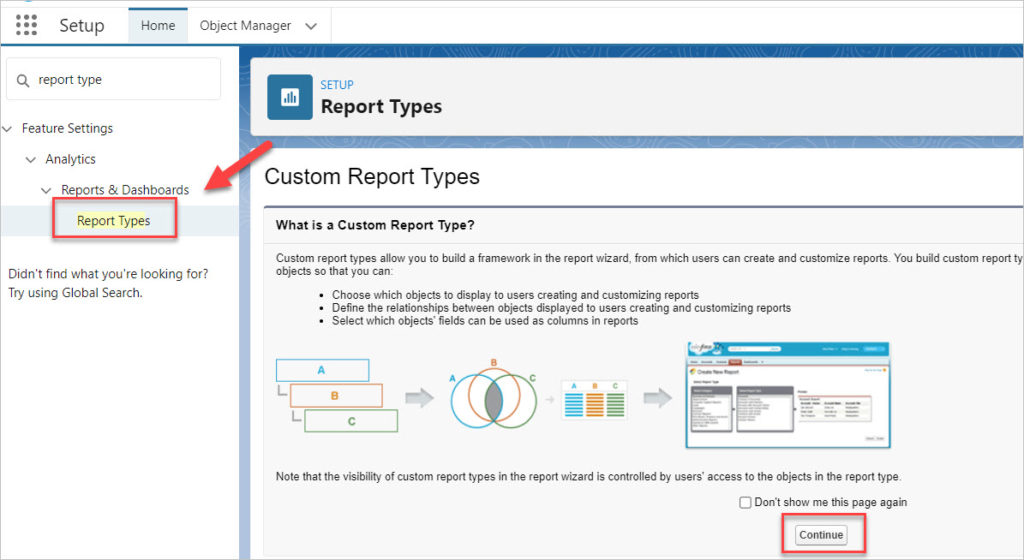
New Custom Report Type

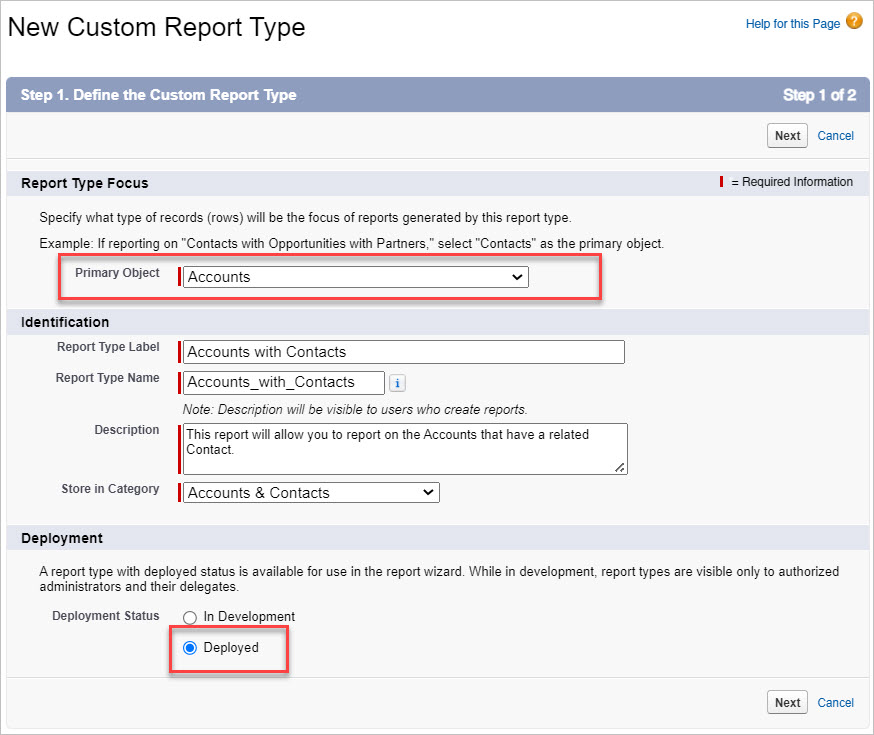
Defining the Custom Report Type
- Primary Object = Account
- Fill in the label, name, description and category.
- Deployment Status = Deployed.
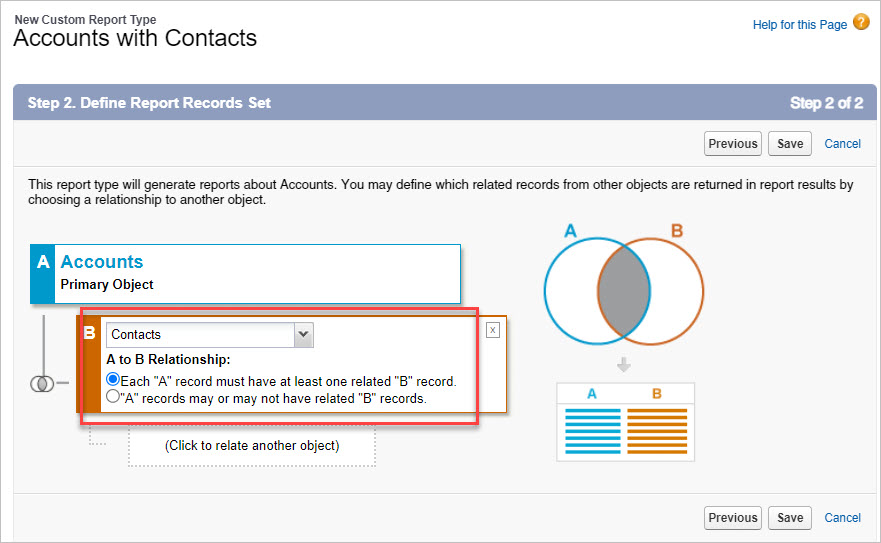
- Choose Contacts from the dropdown
- Make sure Each "A" record must have at least one related "B" record is chosen. This means that accounts without contacts will not come into this report.
- Click Save.
How to Add a Cross Filter to your Report
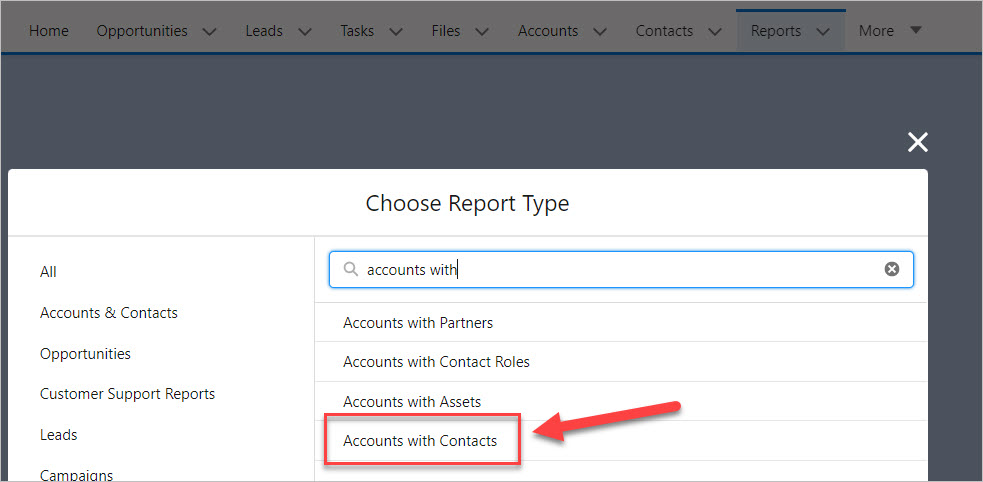
- Go to the Reports tab and select your new Report Type called Accounts with Contacts.
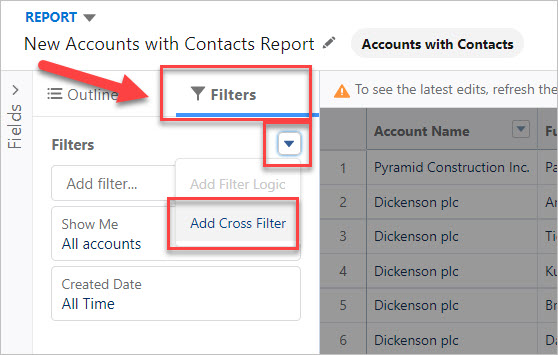
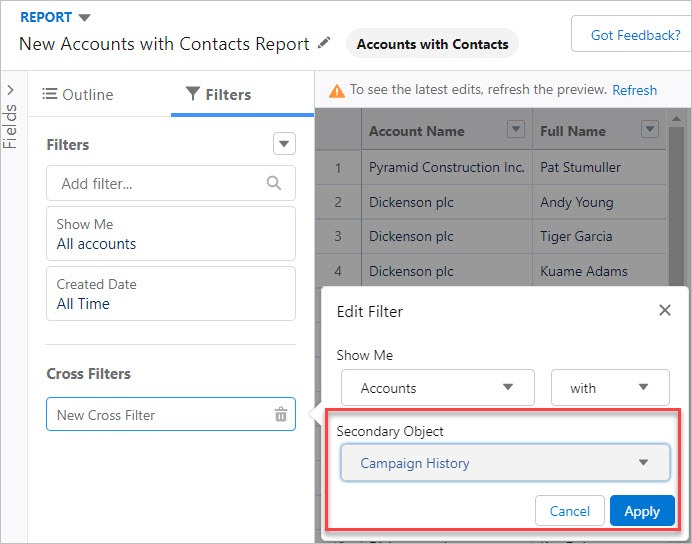
- Click Edit and choose the Filter tab. Click the dropdown arrow and select Cross Filter.
- Choose Accounts with Campaign History
- Click Apply
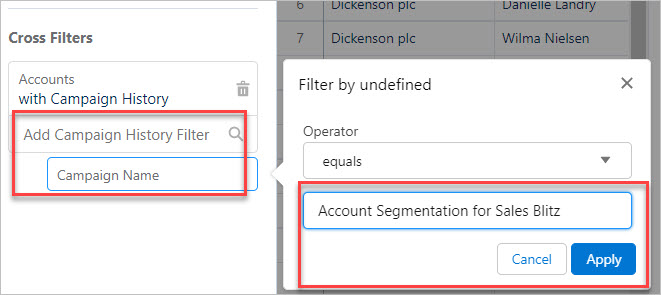
- Click where it says Add Campaign History Filter
- Choose Campaign Name from the dropdown
- Enter the campaign name into the text box. This must be exactly the same as your campaign name on the campaign record.
- Click Apply
- Click Save and Run
How to Add the Contacts to your Campaign
- Run your report - make sure you are not in edit mode.
- Click the Add to Campaign

- Select the appropriate campaign
- Select Member Status
- Click Submit
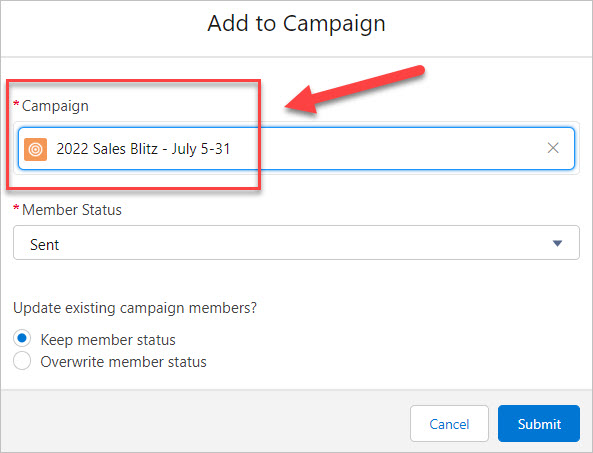
You will notice this campaign is different than our Account Segmentation campaign that we used in the cross filter. You do not have to make separate campaigns. Typically, the Account Segmentation campaign we use for cross filters is deleted after we are done adding contacts to the campaign.
You will receive an email letting you know the campaign members have been added successfully. Go to the Campaign page and confirm the members are there. That's it, you should be all set!
For any questions, comments, concerns – let us know in the comment section below!
We would love to hear from you!